By Karl Baumgarten
London Aquaria Society, Ontario, Canada. May 2001
Aquarticles
http://www.ajibtu.com


In this article, I will try to enlighten you on the topic of the care and breeding of Betta splendens, also known as the Siamese Fighting Fish.
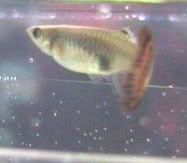
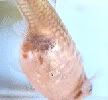
The Siamese Fighting Fish originated in Thailand and Indonesia, where it lives in swamps and rice paddies. The original betta doesn’t have the long, colourful, flowing fins and thin long body of the fancy type, but instead has a short, stocky body with fins like a female betta, with red, green and blue being the predominant colours. The wild types are more aggressive and have more muscle than that of the fancy type.
The betta can be a very peaceful fish, but is considered aggressive for two reasons:
1. Defence of territory, and
2. The right to breed with a female.
The betta, in my opinion, is one of the easiest first fish to keep, because they don’t require a huge tank with an expensive filter, and they don’t need to be fed expensive foods. The betta requires a small container (bowl or jar), likes to be fed once or twice a day and likes the water to be changed every four or five days, and that’s what makes it such a good beginner’s fish. It doesn’t require a lot of intense attention and care.
I have been breeding bettas for about a year and a half, and have had about ten or so successful spawns. It first started with a trip to the Local Pet Store (seems it always starts this way!) when I left with a pair of red/blue bettas, a ten gallon tank, a filter, food and a book on the care of the fish. Suffice to say, they didn’t survive long, and I never got them to breed. I continued to buy more from the pet store and finally got a couple of spawns to take place. I went on the Net, did a bit of searching, and had a couple of shipments of IBC (International Betta Congress) quality bettas sent to me. I started breeding them, and to this day, I breed and show my fish and have won many CAOAC awards for my bettas. (They love me, they really love me!!).
I will now explain various tail types and main colour variations of the bettas:
Tail Types
Veil tail: This tail type is the most common and what is usually found in pet stores. The gene for Veil tail is dominant and is very hard to breed out of a line. The tail is long and thin and usually tapers to a point. Delta tail: This is where the tail is in the shape of a delta coming off of the caudal peduncle. The spread is measured in degrees and can vary from 50 degrees to 70 degrees.
Super Delta Tail: This is a wider form of the Delta Tail and the the spread of the caudal fin is usually from 70 degrees to 120 degrees.
Ultra Delta Tail: This is an even more glorified version of the Delta Tail. The caudal fin spread is usually between 120 degrees to 160 degrees.
Half Moon: The tail shape is self-explanatory, but for the article’s sake, I will explain. The Half Moon is the caudal fin spreading off of the caudal peduncle at 160 to 180 degrees, and the rays must be of even length. (This rule applies to all forms of the Delta Tail as well). It is hard to find true Half Moon and they are very expensive. Anything labelled as HM (Half Moon) Genotype usually has a spread of more than 90 degrees. The anal fin on the Half Moon or a Half Moon Genotype is usually extended.
Double Tail: This tail type is a very beautiful one, where the caudal fin is split in the middle, producing two caudal peduncles and what are referred to as tail lobes (fins). A true Double Tail should have an even split right to the body and have two caudal peduncles. The dorsal fin on a Double Tail is extended. Breeding Double Tails to Double Tails is a very risky cross, as this will produce fish with spinal deformities and short bodies due to the twin caudal peduncles. This tail type can sometimes be seen in combination with any of the Delta Tails and Half Moon bettas.
Crowntail: This is the newest and most expensive tail type to date. This type shows the fins rays extending past the webbing of the fins.
SR (Single Ray) is just that--only one ray extends past the webbing.
DR (Double Ray) has each ray dividing into two rays at the webbing.
TR (Triple Ray) is very rare--the rays divide into three at the webbing.
DDR (Double Double Ray) is very expensive, and the rays divide into two at the webbing, then each of those two split rays will divide into two again looking like four rays. The number of rays is counted on the caudal fin only, as the dorsal and anal fins only have single rays coming off the webbing. This tail type can be seen in combination with Double Tail and any of the Delta Tails and Half Moon types.
Common Colours
Red: The fins and body are bright red, paling out at the gills and head.
Extended Red: A glorified type of Red in which the red colouration extends past the gill plates and head. Royal Blue: The body and fins are a dark, royal blue, ending at the gill plates. The head is usually dark grey-black. This colour is very prone to red wash (where red can be seen in the fish, usually the fins.)
Steel blue: The fins and body have a light grey-dark gun-metal blue colour ending at the gills and head, which are the same as the royal blue. This colour is also very prone to red wash.
Turquoise: This is a faded bright green throughout the body, ending at the gills and the head is that of a blue betta. (i.e.: greyish black)
Black/Melano: This is one of the hardest to get in its pure form, and is one of the most desirable colours to breed for in bettas. The whole body and fins are midnight black, and in its pure form, very beautiful. Males of this colour are very fertile, but a fertility problem rests in the females. It hasn’t yet been proven, but there is a link between the Melano gene and the females' reproductive system that makes them infertile. To get blacks, the best combination is to cross a Melano male to a Steel Blue female. (If she carries the gene for Melano, then you’ve got it made). It is one of the most desired colours to breed and is a challenge to keep the quality. The chances of obtaining or raising a fertile TRUE Melano female are astronomical. So if you find one, let me know ASAP.
Black Lace: In this type, the black has a more washed-out appearance. These fish are fertile, the black lace look is actually a steel blue colouration that is the result of a steel X black early in its ancestry (Probably back when our editor was born!) (Just joking Lynn.)
Yellow: This colour is a yellow which can range anywhere from an almost clear to a bright butter-yellow covering the whole body and fins.
Cellophane: This fish in its pure form, is a clear-finned pale (very pale) yellow. This is an excellent colour to use to increase finnage and body size, as in its purest form, it doesn’t carry any colour genes that would affect your reason for using it. (Editor’s note: Possibly amelanistic, and recessive colour gene, thus unable to dominate over other colours)
Chocolate: This colour is between black and yellow and can be dark brown to a light brown, almost yellow. A very nice colour and a somewhat desirable one to breed.
Opaque: This colour is the whole fish having a milky opaque colour. It comes in White only, and is very desirable in its purest form, with no red wash.
Pastel: This is when the fish has an oily-pastel look to it and it comes in three main colours: Blue, Red, and Green.
These are the solid colours found in bettas. There are many combinations, butterflies, marbles and bi-colours. If I were to explain them all, I would be here forever.
So, finally, the breeding and raising of these beauties . . .
STEP 1: Conditioning a pair for spawning
When conditioning a pair, feed a variety of foods - many live and frozen foods. Every day, or every other day, water changes in the container are a must, as more and better foods, together with lots of clean water, helps to get a pair into condition to spawn. Condition a pair for no less than a week, and two weeks or more if they have just recently arrived via a shipment or if they come from a pet store - the fish may have suffered from a lack of clean water and good food.
STEP 2: Setting up the spawning tank
For spawning, in my opinion a ten gallon tank is the best. I have spawned fish in a 2.5 gallon up to a 20 gallon, but the 10 gallon with three inches of water works best. You’ll need a tank, a 50w submersible heater (anything larger may cook them!), a sponge filter (turned off during the actual spawning process), and lots of plants. You may use either live or plastic plants, but live plants work better. They keep the water cleaner while the filter is turned off, as well as culturing infusoria to serve as the first food for the fry. I use Java moss and find it works the best for hiding, and the density is perfect. For a bubble-nest site, a Styrofoam cup cut in half (resembling an airplane hangar) works well. You need a tightly sealing lid for the top of the tank, as betta fry need the air and water temperatures to be the same in order to properly develop the labyrinth organ (common to the family Anabantidae). Set the heater to 80 degrees F - no more, no less. Start this process about a week before the proposed spawn date in order to balance and stabilise the temperature. The pH and water hardness are not really critical to bettas, just the temperature. Have a container (such as a glass lantern chimney) to put the female in, so that the male can see her but can’t get at her. Place this near the spawn site, but not touching the Styrofoam nest site.
STEP 3: Introducing the pair to the spawning tank
Place the male in a small cup of water and float him in the spawning tank for half an hour ( after the first fifteen minutes, dump out half of his water, replacing with water from the spawning tank). At the end of the half hour, dump the male into the tank. Then add the female in the same fashion, after first being sure that her container is closed so that the male can’t tip it over in his excitement. When her half hour has elapsed, place her into the glass enclosure where she will remain until she is released for spawning.
STEP 4: Releasing the female
Releasing the female from the glass enclosure too early may cause undue damage, so be patient at this stage. There are four main signs that will help you determine if the female is ready to spawn:
1. The female, when ready, will no longer be scared of the male, but will be more inclined to swim with him and even flare back.
2. Look at the female’s stomach - females always carry eggs, but when ready to spawn she will fill up hugely enough to look like she swallowed a marble.
3. The female will show vertical bars on the body indicating readiness to spawn, as opposed to the horizontal bars associated with fear or stress. This sign is not the most accurate, as pastel or opaque females don’t show any sort of bars. This sign should only be used in combination with #1 & # 4.
4. The last signs to indicate a female's readiness to spawn is that she will clamp her fins and swim with her body slanted forward, and will exhibit the vertical barring, and she will be doing a wiggling dance. (I don’t know what it is, but it's true.)
STEP 5: Spawning process
When a female is showing three or all of the signs, she is ready to be released. You should carefully take her out of the enclosure and place her away from the male in the tank. She will swim around and when the male sees her, he will flare at her and chase her around the tank. There will be some nipping of the fins - this is normal. It is not pretty, but that’s nature! Hopefully, at this point, he will have a well-built sturdy nest. If not, don’t worry, I have had males spawn and protect the eggs/fry without a single bubble. The female will come out once in a while from hiding to inspect the nest. If it isn’t to her liking, she will bite at it and jump at it, destroying it. He will chase her into hiding again and resume building. Once she approves the nest, she will come out doing the head-down dance, and will approach the underside of the nest. They will start the embrace. They will come at each other and circle. The male will grip her with his body and flip her upside down while wiggling and squirming. He will then tighten and go almost lifeless, at which time she releases the eggs while he releases the sperm. The embrace will last for 10 to 20 seconds. Then the male will “come to" and collect the eggs while coating them with saliva, to spit into the nest. They will continue this process for one to three hours, although I have had a spawn last for five hours. After they are done, he will chase the female away and you can remove her and her enclosure. Sometimes they don’t spawn the first day, and you’ll need to put her back into her enclosure for the night, or she may seek revenge on the male.
STEP 6: Daddy duties
Once spawning is complete and the female is safely removed, the male will guard the nest and any eggs that fall out will be put back into the nest. You need to leave a light on the tank (or nearby) so that he can see the eggs that may fall at night. After two or three days, the eggs will hatch and tiny (very tiny!) fry can be seen hanging from the nest. Now his job gets much harder, as the fry wiggle and fall out of the nest more frequently and the male has to keep up with them. In about two to three more days, the fry will begin to swim on their own horizontally. Now you can remove the male - his job is done.
STEP 7: Raising the fry
Once the fry are free-swimming, they need to eat lots of tiny food particles. They won’t usually eat for the first five or six days after hatching, but then you can feed live food and small flakes or pellets. “Liqui-fry for egg-layers” works great, as do micro-worms and vinegar eels. Now the filter may be turned back on (at a low rate). Keep the temperature at 80 degrees F, and leave the lid on the tank as warmth is crucial to the fry developing properly. Water changes may be started two weeks after they are free-swimming, after they are strong enough to swim away from the siphon. Keep this up for two to three months, when the young males will start to develop their characteristics - fins will elongate and aggression will increase. When the fish are three or four months old, wean them to frozen food and pelleted diet.
That’s all it takes to raise them. It may look complicated, but once you get the hang of it, it's both fun and enjoyable. You can then sit back and say "For the past three months or so, that’s what I have to show for my work!” and it's very pleasurable.


